JointTex now works as an MCP app in ChatGPT. Once it is connected, you can ask ChatGPT to read your paper, edit the source, compile it, and reply to review comments, all from a ChatGPT conversation, on the same live project your coauthors have open in the editor.
Setup takes about a minute. There is no token to copy: you paste one address into ChatGPT and sign in to JointTex when it asks.
What you need
- A JointTex account on Education, Plus, or Pro.
- ChatGPT, with access to creating MCP apps.
Step 1: Open Plugins and create an MCP app
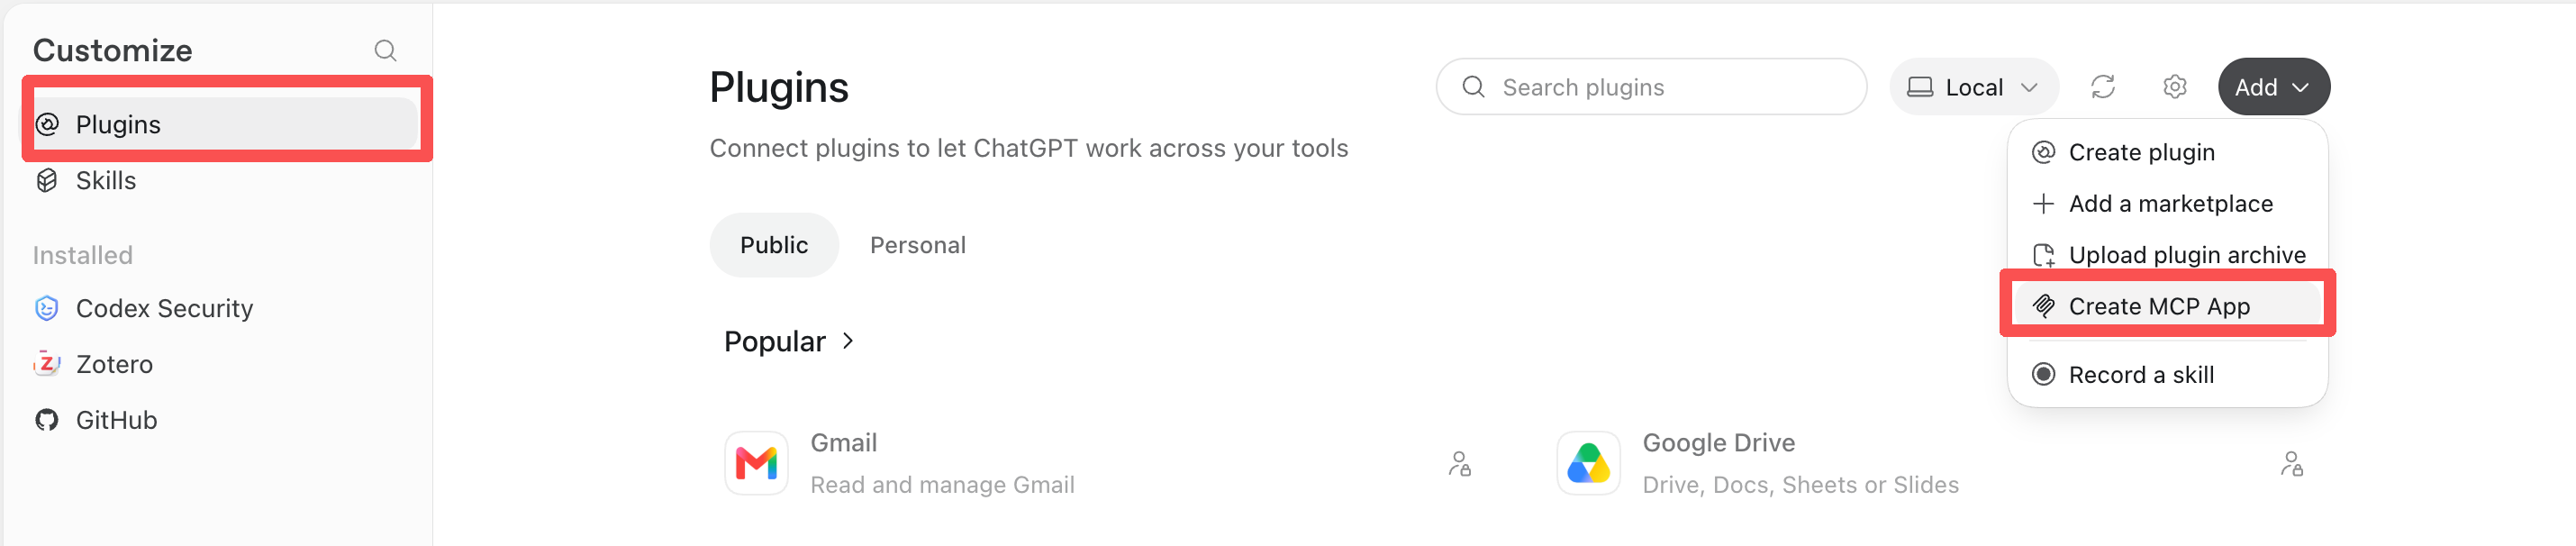
In ChatGPT, open Customize and select Plugins. Click Add in the top right and choose Create MCP App.
Step 2: Enter the JointTex address
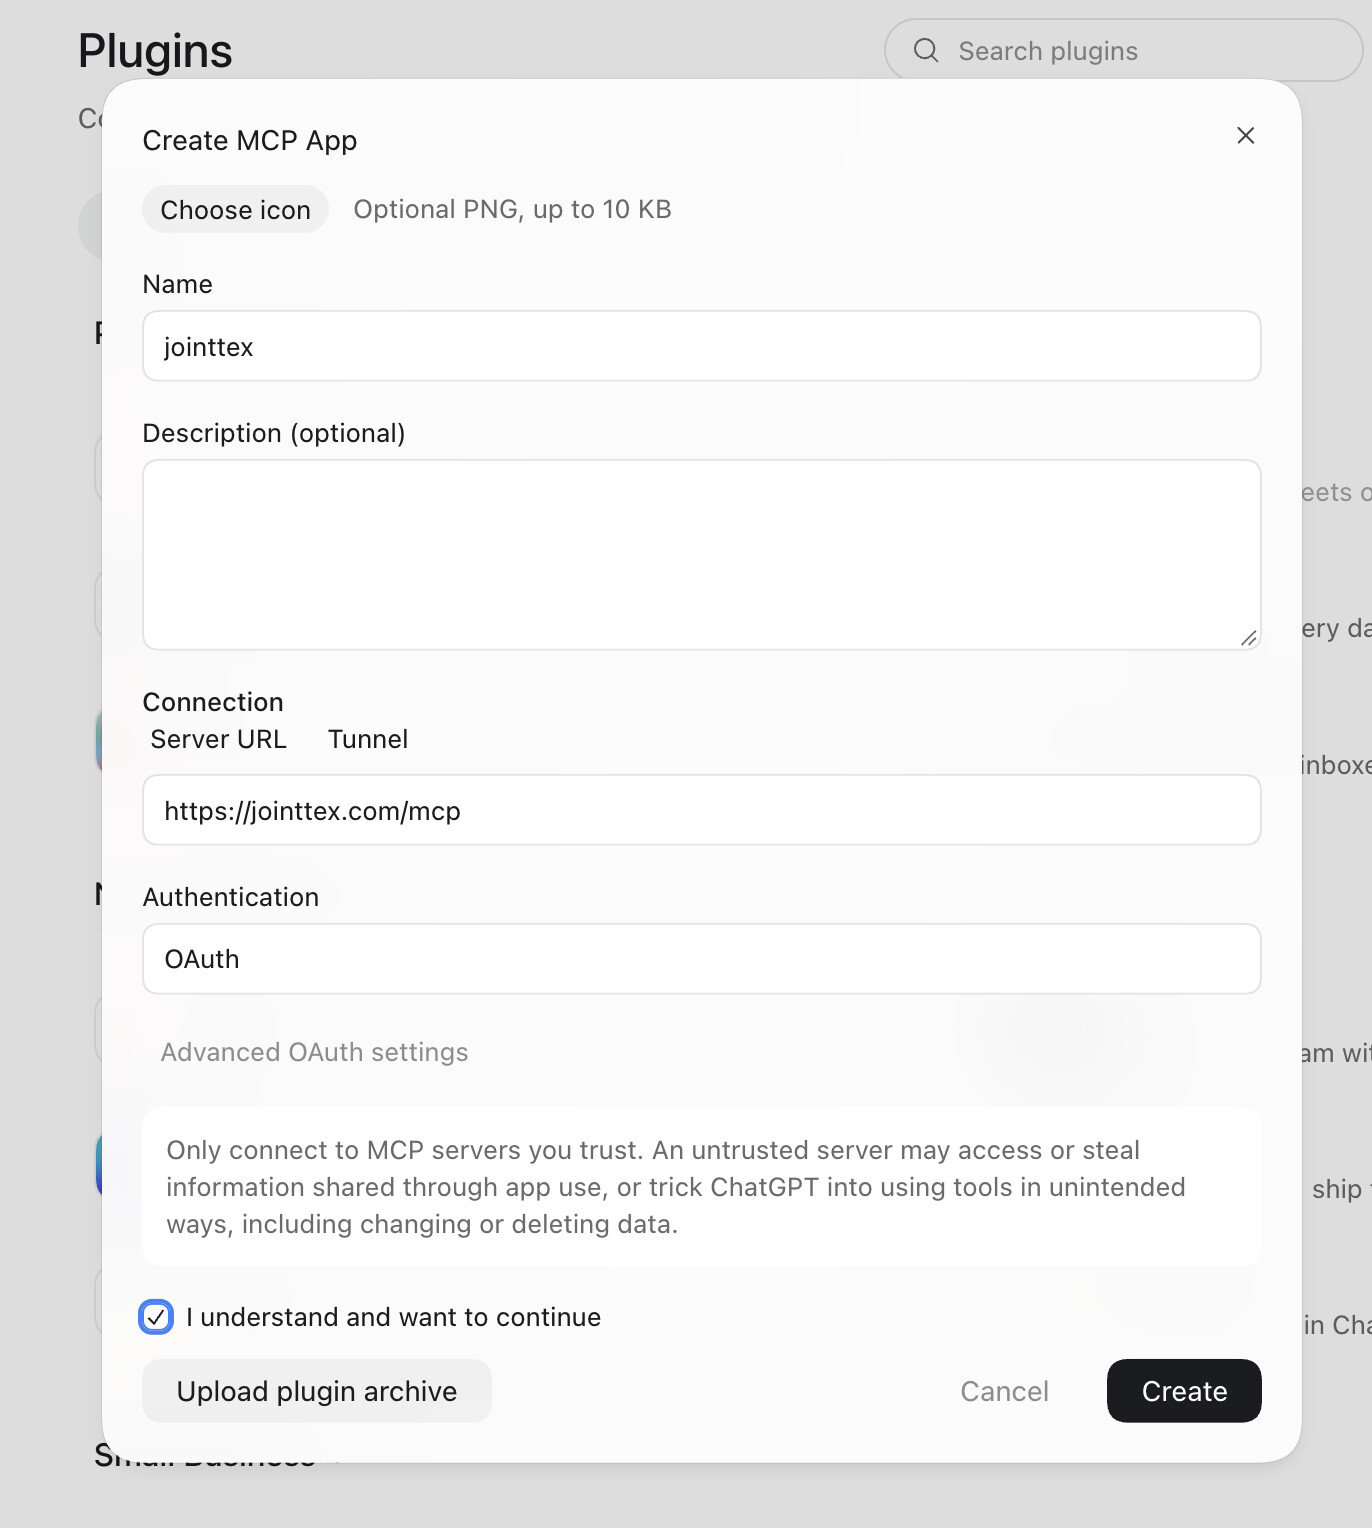
Fill in the dialog:
- Name: anything you like, for example
jointtex. This is only the label in your plugins list. - Connection: keep Server URL selected and paste the address below.
- Authentication: OAuth.
https://jointtex.com/mcp
The description and icon are optional, and you can leave the advanced OAuth settings alone. Tick I understand and want to continue, then click Create.
Step 3: Connect and sign in
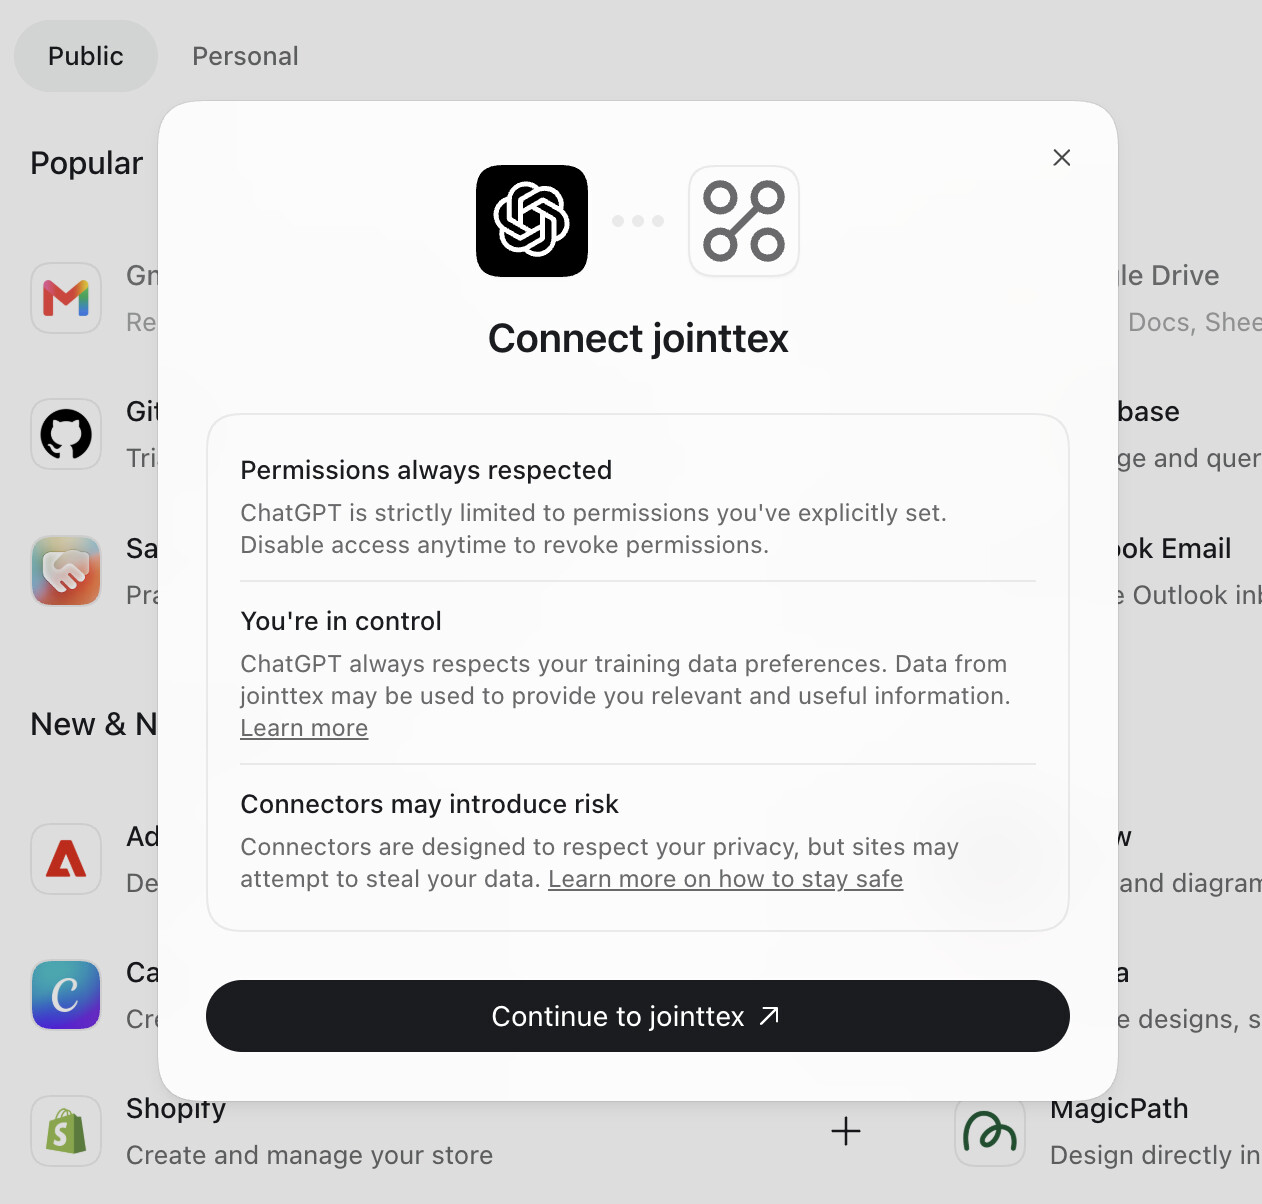
ChatGPT shows a Connect jointtex dialog. Click Continue to jointtex.
Your browser opens a JointTex page asking whether to connect the app. Sign in if you are not already. The page shows which app is asking and where your browser will be sent afterwards, and lets you choose what the app may do and which projects it may open. Click Allow.
Step 4: Check that it is there
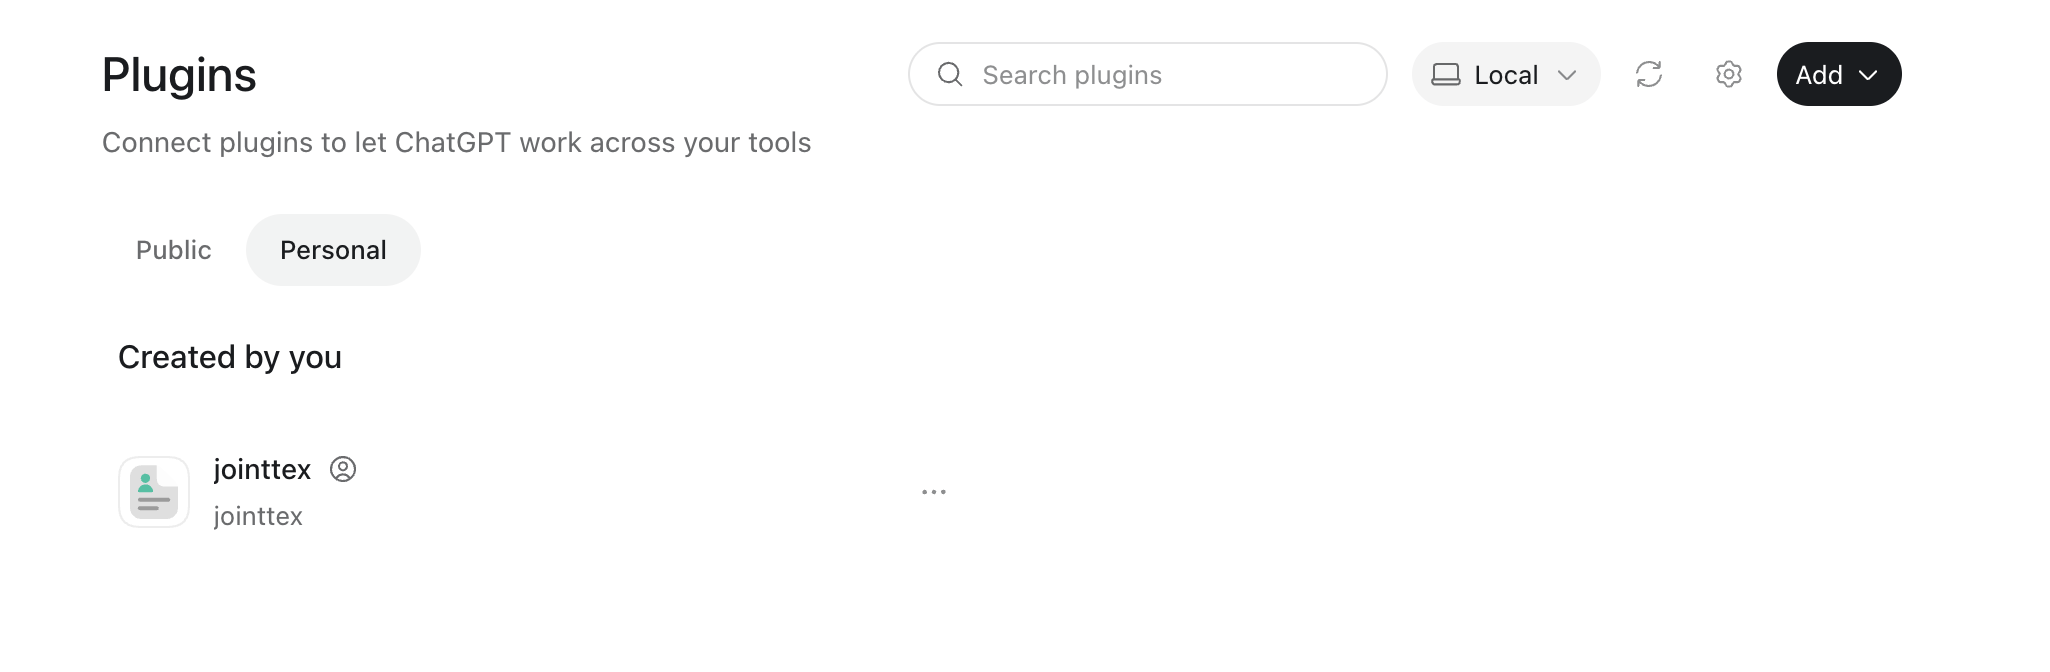
Back in ChatGPT, open Plugins and switch to the Personal tab. JointTex is listed under Created by you.
What ChatGPT can do in a project
Read (8 tools): list your projects, get a project’s context, list files, read a file, search files, read comments, read tracked changes, and get the compiled PDF.
Change (15 tools): create, replace, edit, rename, copy, move and delete files and folders; compile the project and change its compile settings; add, reply to, resolve and delete comment threads.
What it may actually use is limited to what you allowed on the JointTex page in Step 3.
Things to try
Start a new conversation, make sure the JointTex app is turned on for it, and ask in plain language:
- “List my JointTex projects.”
- “In my thesis project, read the introduction and point out claims that have no citation.”
- “Compile the project and fix the errors in the log.”
- “Read the open comments in
methods.texand reply to each one with a proposed change.” - “Give me a link to the compiled PDF.”
Good to know
- It is the same project your coauthors see. ChatGPT’s edits land in the live document, and its comments appear in the same threads as everyone else’s.
- Compile settings are shared. The root file, engine and TeX Live version belong to the project, so a change there affects every collaborator’s compile. The app is told to change them only when you ask or the build needs it, and to say what it changed.
- PDF links expire. A link from “Get the compiled PDF” works for ten minutes and needs no sign-in, so treat it like the PDF itself and ask for a fresh one when you need it again.
- Usage. ChatGPT’s side of the conversation counts against your ChatGPT plan, not your JointTex AI allowance. Compiles count toward your normal JointTex compile limit.
- A comment thread ChatGPT started is one it can delete. It cannot delete threads other people started; it can only resolve them.
Changing or removing access
In JointTex, open Account settings → Access tokens. ChatGPT is listed under Connected apps, where you can narrow what it may do, change which projects it can open, or disconnect it. A disconnected app loses access immediately. A connection that goes unused for 30 days ends by itself, and you sign in again to bring it back.
You can also remove the app from the ⋯ menu next to it on ChatGPT’s Plugins page.
Other apps
Any app that accepts an MCP server URL can connect the same way, with the same address. Using Claude? See the Claude guide on this forum. For clients that send a header instead of signing in, create an MCP token on the same Access tokens page.
Questions or something not working? Reply below.